
It seems that every time we post here on the blog these days, we lament that it has “been far too long!” The same is true this time around. Senior year has been the biggest whirlwind, but it has also been wonderful and so fun. We are keeping busy spending time with friends, periodically cooking with them (last weekend we made homemade ravioli and hope to write a post about that), attempting to do homework, enjoying the small moments at our college, and thinking about the future–that’s all!!!
Cooking is a passion that has threaded through our college and high school years, and homemade pizza is one of those meals that has become integral to that thread, since we’ve been making it since sophomore year of high school. One of the best purchases we ever made when stocking our kitchen was getting a pizza stone. Homemade pizza is a joyous process, and completely-from-scratch pizza is so delicious and fun to make. It is a practice in patience, but well worth it. Starting with the dough, shredding the cheese(s), mixing the sauce, shaping the pizza (each one is different), topping it, and baking it in a hot oven until charred is a process entirely fueled by hand. A finished pizza really is–no matter the form– a piece of edible art, beautiful and flavorful. The irresistible aroma is a welcome side effect. We actually just brought our pizza stone back to college with us after Easter break and will be using it here soon!
Over time we have learned a few pizza essentials:
–Preheat the oven for at least an hour, ideally at 550 degrees
–Freshly shred the cheese every time
–Stretch the dough thin but don’t mess with air bubbles in the edge crust, because they add character
–Follow the Pizza Camp method!
Joseph Beddia owns Pizzeria Beddia in the Fishtown neighborhood in Philadelphia, surrounded by trendy neighbors such as Cake Life Bake Shop, La Colombe’s flagship, and Weckerly’s Ice Cream. The current Pizzeria Beddia actually just temporarily closed, as Beddia is preparing to open a much larger store next year. We never made it to the old location, despite the hype, but have walked by it in pursuit of ice cream. Still, when he published a cookbook, we immediately bought it and are converts to his method. This is in no ways an advertisement…we just have found a pizza recipe that we adore!
Beddia does a couple of things differently. Typically, many of the recipes I’ve seen and used before (including one from Cook’s Illustrated) involve just a 2-hour rise, no overnight ferment. Beddia’s dough takes about 36 hours from start to finish, but it’s very simple. It just needs a long rest in the fridge! He doesn’t cook the tomatoes in his sauce. He also uses a combination of fresh and block mozzarella to achieve a good moisture balance. He bakes the pizzas for several minutes in a hot oven, and then finishes them under the broil for additional char. After baking, he tops his pizzas with a drizzle of olive oil and a fresh grating of a hard cheese (we usually use Parmesan or Romano). We adore his recipe and for now consider this our go-to at-home recipe.
Pictured at the top of this post is his white pizza topped with spring cream, pickled red onions, Swiss chard (he calls for kale, but we had some beautiful Swiss chard on hand and used that instead), and chives. I don’t have that recipe on hand at school with me, so this post will be updated with it down the road. It’s amazing!
Here’s how you make a great classic pizza! Plan ahead and prepare to be delighted.
Great Pizza
Makes 2 16-ish inch pizzas
Recipe slightly adapted from Pizza Camp
For the dough (2 1-lb. balls):
1 1/2 cups cool water (355 grams)
2 tsp sugar
1/2 tsp active dry yeast
1 tbsp extra-virgin olive oil
3 1/2 cups (500 g) all-purpose or bread flour (we typically use bread flour)
1 tbsp + 1/2 tsp fine sea salt (we might cut this a bit in the future because if we have one complaint, this dough can be a touch too salty. But we haven’t tried it with reduced salt ourselves, yet)
Directions for the dough:
Whisk together the water, sugar, and yeast in a large stainless steel bowl. Stir in the olive oil. Then add the flour. You can either mix it by hand, or if you have a stand mixer, use the dough hook attachment and mix on low speed until all the flour is evenly incorporated. Cover the bowl with plastic wrap or a damp towel/plastic wrap and let it rest for 30 minutes to allow the gluten to develop and make the dough stretchy.
After 30 minutes, using wet hands or a dough scraper, mix in the salt until completely incorporated, folding the dough over on itself. The dough should be smooth and stretchy. Cover the bowl with plastic wrap and refrigerate for 24 hours.
After 24 hours, remove it from the fridge and scrape it onto a well-floured surface. Flour your hands and grab the two ends of the dough mass, pulling them together to meet in the center. Rotate the dough and repeat, incorporating the dough into itself until the ball of dough is rounded. Cut the dough ball in half and repeat this shaping technique, forming two smaller dough balls that are very smooth-surfaced. Add more flour to the surface as needed. Leave the dough balls on the floured surface and cover in a kitchen towel until doubled in size. This will take about 3-4 hours. The risen dough will feel smooth and supple (if you aren’t ready to make pizza yet, you can keep the dough another 24 hours in the fridge, but Beddia doesn’t recommend leaving it in there much longer).
For the sauce:
1 28 oz can crushed tomatoes
2 cloves garlic, minced
1 1/2 tsp fine sea salt, or to taste
2 tbsp extra virgin olive oil
Directions for the sauce:
Pour the crushed tomatoes into a nonreactive container. Stir in the garlic, olive oil, and salt (you don’t want the sauce to be overly salty). Refrigerate the sauce for a couple of hours before you use it. It can be stored up to 1 week in the fridge.
For assembling the pizzas:
Final ingredients:
6 oz. (85g) fresh mozzarella
4 cups/440 grams of shredded low-moisture mozzarella
Hard cheese, such as Parmesan or Romano
Directions:
Preheat your pizza stone on the lowest shelf of the oven for at least an hour before baking, at the oven’s maximum temperature. Ours goes up to 550, but some just to 500.
Here’s where we diverge a bit from the original directions: he uses a pizza peel, dusted with semolina flour, but we like to form our pizzas on rounds of parchment on a baking sheet. We use the sheet as a peel to transfer the parchment with the pizza on top into the oven. About halfway through baking, we typically slide the parchment out from underneath the pizza to prevent any steam from developing and making the pizza soggy (the paper can also burn if it cooks too long).
So if you’re using our method, take a square of parchment. Take a dough ball and flour it well. Begin by flattening the center and widening the dough into a round that is 7-9 inches, using your fingertips. Make sure to preserve a lip around the edge of the dough that will form the edge crust. Gently stretch the dough into a wider 14-15 inch surface. You can pick up the dough and stretch it carefully over your fists, letting the dough hang so that gravity stretches it for you. Place the dough back onto the parchment.
Top with 3/4 cup of sauce, distributing it evenly over the crust but preserving the edge lip. Add 3 oz of fresh mozzarella, tearing it into little pieces and evenly distributing it across. Add 2 cups of the shredded mozzarella. Transfer the pizza to the oven. Once it has begun to puff and started to brown, about 4 minutes, switch the oven to the broiler and cook until nicely charred. In total it will take about 10 minutes, or perhaps a bit less.
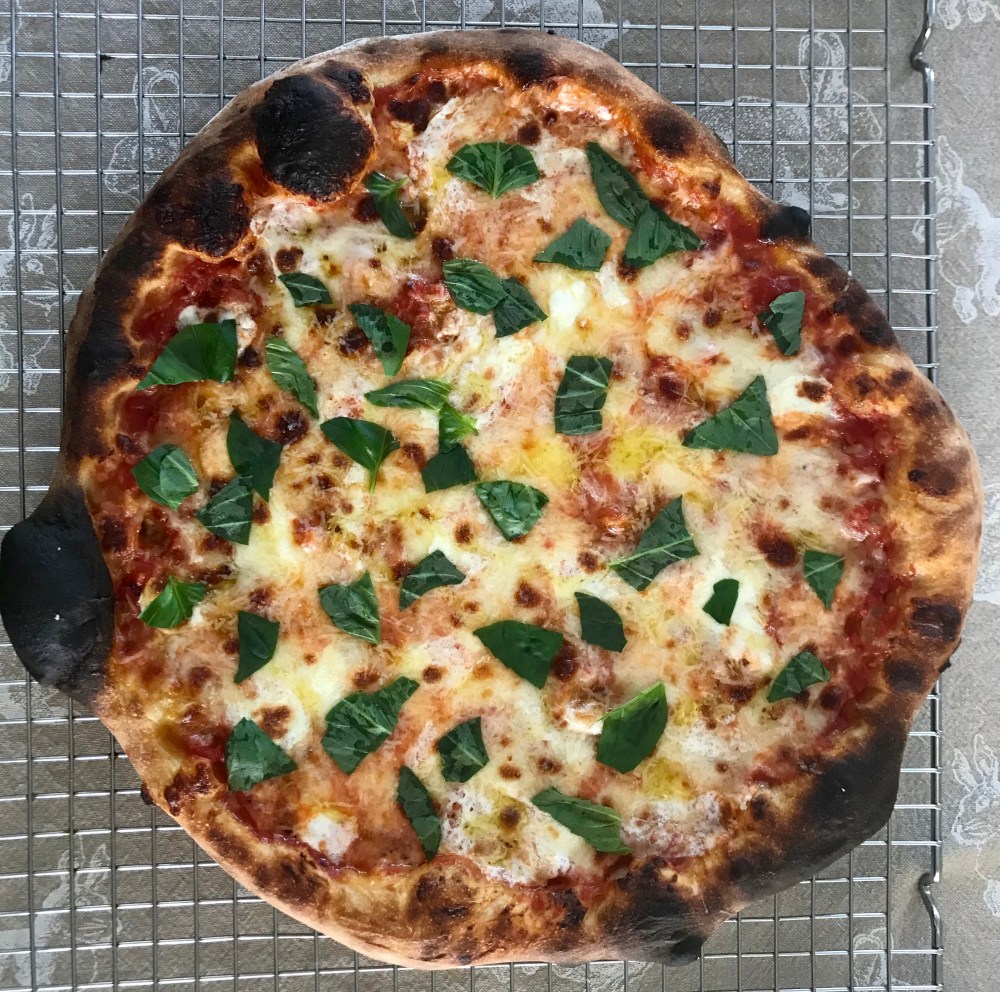
Remove the pizza from the oven and top with a light drizzle of olive oil and some freshly shaved hard cheese. We like to tear up a bit of basil over the top, too. Let the pizza cool for a couple of minutes before slicing and serving.
Repeat with the other dough ball (you’ll have extra sauce)
Enjoy!

Hi Celine and Leah!
Your piZza sounds amazing and I cant wait to incorporate some of your methods into mine!
If I can throw my hat into the ring, I’d d like to share my suggestions – I like to put my cheese down first, before the sauce. I feel like it helps with making the pizza more crisp and the save on top is pretty!
I always like to add some fontina or just provolone into the mix w the mozzarella; I like the additional flavor 😋
Now let’s have a pizza party, then Henry’s miss you 🙂
So good to hear from you!! We will try that out sometime 🙂 Sounds like the Pappone’s flip-it method! Leah and I will both be in Pennsylvania for the summer and it would be so lovely to see all of you (and Leah will be attending grad school in Philly in the fall. I’ll be in NYC!). Say hi to the kids for us ❤️ We miss you guys too! –Celine